Geometry Repair Tool
1.0 Introduction
This tutorial will demonstrate how to use the manual elements of the Geometry Repair tool included with RS3. The repair tool identifies and helps fix defects in surfaces and volumes. This tutorial uses an open-pit model featuring examples of all currently-detected geometric defects:
- Near-Degenerate Features
- Holes
- Near-Folding
- Self-Intersections
- Non-Manifold Features
Manual repair is useful if you want to modify the geometry as little as possible. You can select and repair only the defects you find most problematic, and leave the rest of the geometry untouched. For more information on the geometry cleaning option, please refer to Geometry Cleaning Overview which describes the automatic process and introduces repair tool.
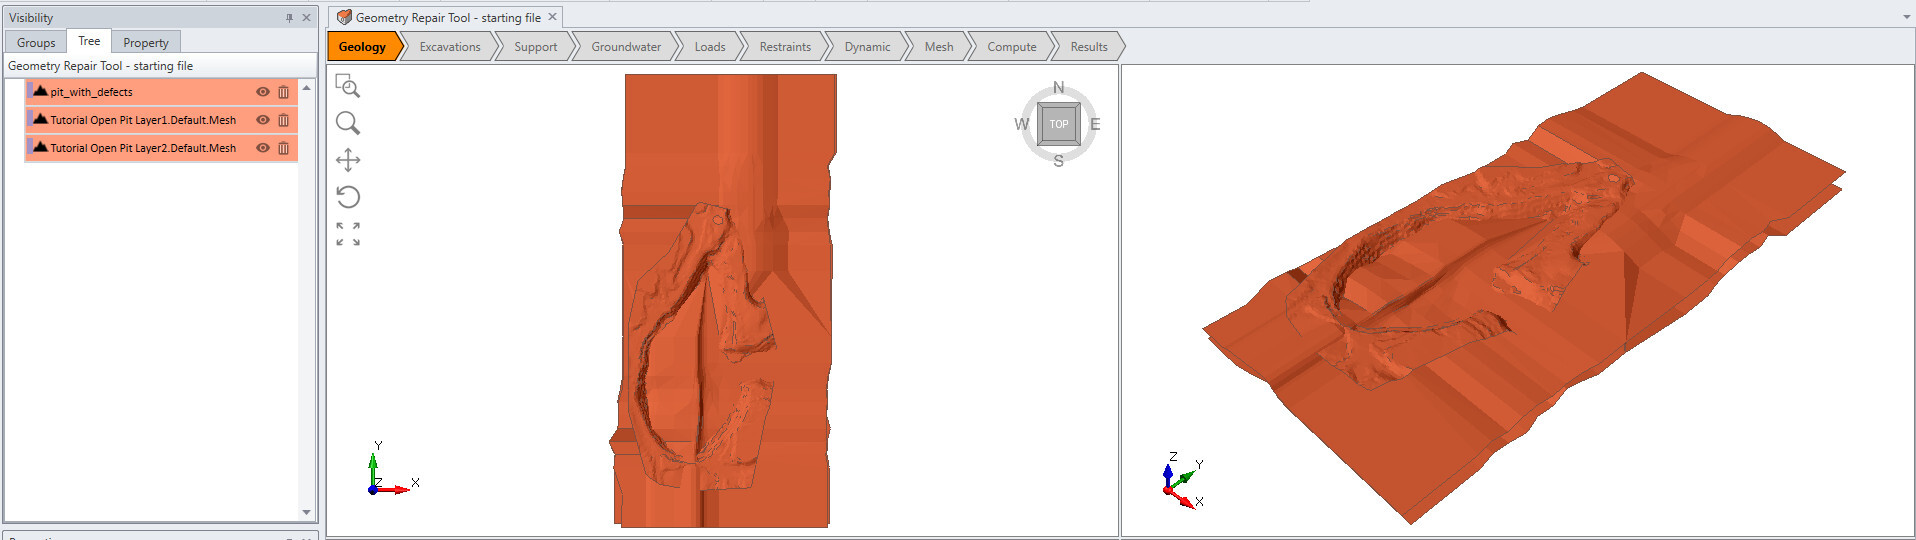
2.0 Open the Model
- Select File > Recent > Tutorials.
- Open the file Geometry Repair Tool – starting file.rs3v3 from the installation folder. This project contains a pit surface, and two horizontal geological surfaces.
- Click on all three surfaces in the Visibility pane to select them.
3.0 Geometry Repair Tool
- Select: Geometry > Repair Tools > Repair. The tool will search the geometry for defects. The more complicated the geometry, the longer this will take.
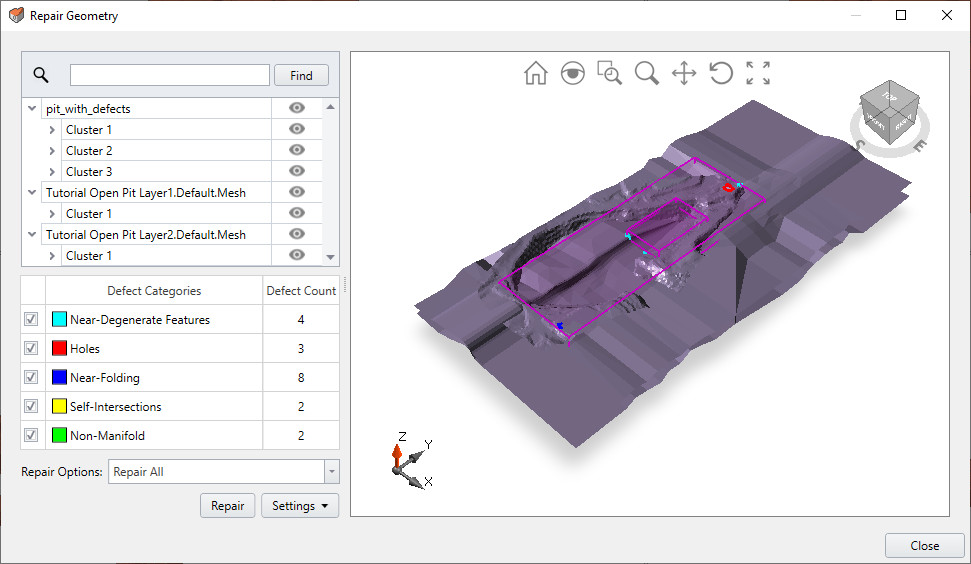
The list of individual items, in the upper left, groups the defects by entity, then cluster. Click the Eye  icon to hide or show a given entity, cluster, or defect, in the 3D view. It is difficult to see all the surfaces because they overlap.
- Click the Eye icon on the two horizontal geological surfaces (Open Pit Layer1 and Open Pit Layer2) to see just the pit surface. Expand the clusters in the pit surface to see the individual defects in each cluster.
The Filtered Results panel allows you to exclude a defect category from the Repair operation. Topological problems like Non-Manifold areas, Self-Intersections, and Holes are the most problematic. Near-Degenerate Features indicate bad quality geometry, but they aren’t always required to be fixed.
- Disable the Near-Degenerate Features category now.
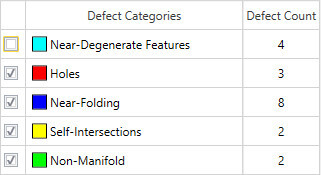
The tool will update the 3D view and the list of defects on the left. You can now see that no defects are listed under the two geological surfaces, indicating that their only defects are Near-Degenerate Features. We will now repair all instances of Near-Folding, Self-Intersections, and Non-Manifold features.
- Change the Repair Options to Repair Selected.
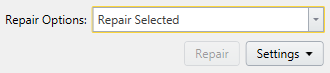
- The tool now allows you to select entities, clusters, and individual defects by checking or unchecking them in the list. We will select everything other than the Holes.
- Click the Select All button in the top left.
- Click the Repair button.
The tool will now attempt to repair all the selected defects. When the tool is complete, note that one of the Holes is no longer present. The missing hole was touching (directly adjacent to) another defect, and so it was repaired along with that defect. You can inspect the rest of the geometry to ensure it hasn’t been undesirably modified.
- In the 3D view, click on the magenta box representing the cluster that contains the two remaining Holes. Clicking in the 3D view is another way to select items.
- Click the Repair button again.
The tool will now attempt to patch the selected Holes. By default, a hole is patched by adding good-quality triangles to its interior, then trying to match the shape (i.e. the first derivate) at the boundary, going into the interior.
You can continue using the tool to repair the Near-Degenerate Features. The pit surface is now ready to be used to create an External volume, and the geological surfaces can safely participate in the Divide All Geometry operation.