Add Piezometric Line
Piezometric Lines are used for calculating pore pressure when the Groundwater Method in Project Settings is set to Piezometric Lines. A Piezometric Line in RS2 can represent a water table, or an actual Piezometric surface obtained from piezometer measurements, for example.
NOTE: unlike other boundary types in RS2, Piezometric Lines may be added either before or after the mesh has been generated (without resetting the mesh), since a Piezometric Line boundary is independent of the finite element mesh.
To add a Piezometric Line to your model:
- Select the Geometry
 workflow tab.
 - Select Add Piezometric Line
 from the toolbar or the Boundaries menu.
 - Enter the vertices of the Piezometric Line as described in Entering Coordinates.
- When all vertices are entered, right-click and select Done, or press Enter with nothing in the prompt line.
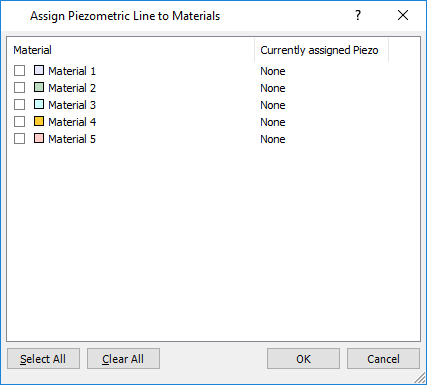
- You will then see the Assign Piezometric Line dialog. Select the check box for each material for which pore pressure is to be calculated using the Piezo Line.
- NOTE:
- Piezo Lines can also be assigned to materials using the Define Hydraulic Properties dialog. The Assign Piezo Line dialog is simply a shortcut, which allows you to quickly assign a Piezo Line to all desired materials at once when you initially create the piezo line. It also decreases the chance of inadvertently forgetting to assign the piezo to materials.
- If you have a staged model, and the piezometric lines are also staged, then you must use the Define Hydraulic Properties dialog to define the staging of the piezo line(s). You cannot define staging of the piezo lines in the Assign Piezo Line dialog.
- When you are finished with the Assign Piezo Line dialog, select [OK].
- The Piezometric Line will appear on the model as a blue line, with an automatically assigned ID number (see below for details).
Piezometric Line ID Number
Piezometric Lines are automatically given an ID number, which will appear at the mid-point of the first and last segments of the Piezometric Line. This ID number is used to identify Piezometric Lines with the corresponding material region(s) of the model, in the Define Hydraulic Properties dialog. The Piezometric Line ID numbers range from 1 to 20, and are assigned in order, according to how many Piezometric Lines are already defined. A maximum of 20 Piezometric Lines can be defined for a model.
Piezometric Lines and Staging
For staged models, different Piezometric Lines can be applied at different stages of the model, in order to model changing groundwater conditions at different stages. This is done through the Define Hydraulic Properties dialog, see that topic for details. You cannot use the Assign Piezo Line dialog (shown above) to define the staging of piezo lines.
Pore Pressure Calculation
Pore pressure is calculated for a Piezometric Line as follows:
Pore Pressure = Pore Fluid Unit Weight * Vertical Distance to Piezometric Line * Hu Value
- the Pore Fluid Unit Weight is entered in the Project Settings dialog
- the vertical distance from a point to a Piezometric Line
- the Hu Value for the material is entered in the Define Hydraulic Properties dialog.
If the distance is negative (i.e. Piezometric Line is below a given point) then the pore pressure is set to zero at that point.
NOTE: you should always make sure that a Piezo Line completely spans all materials to which it is assigned, so that the pore pressure can be calculated at all points in the material. If a piezo line does not exist above a point in a material to which it is assigned, then the pore pressure is set to zero at that point.